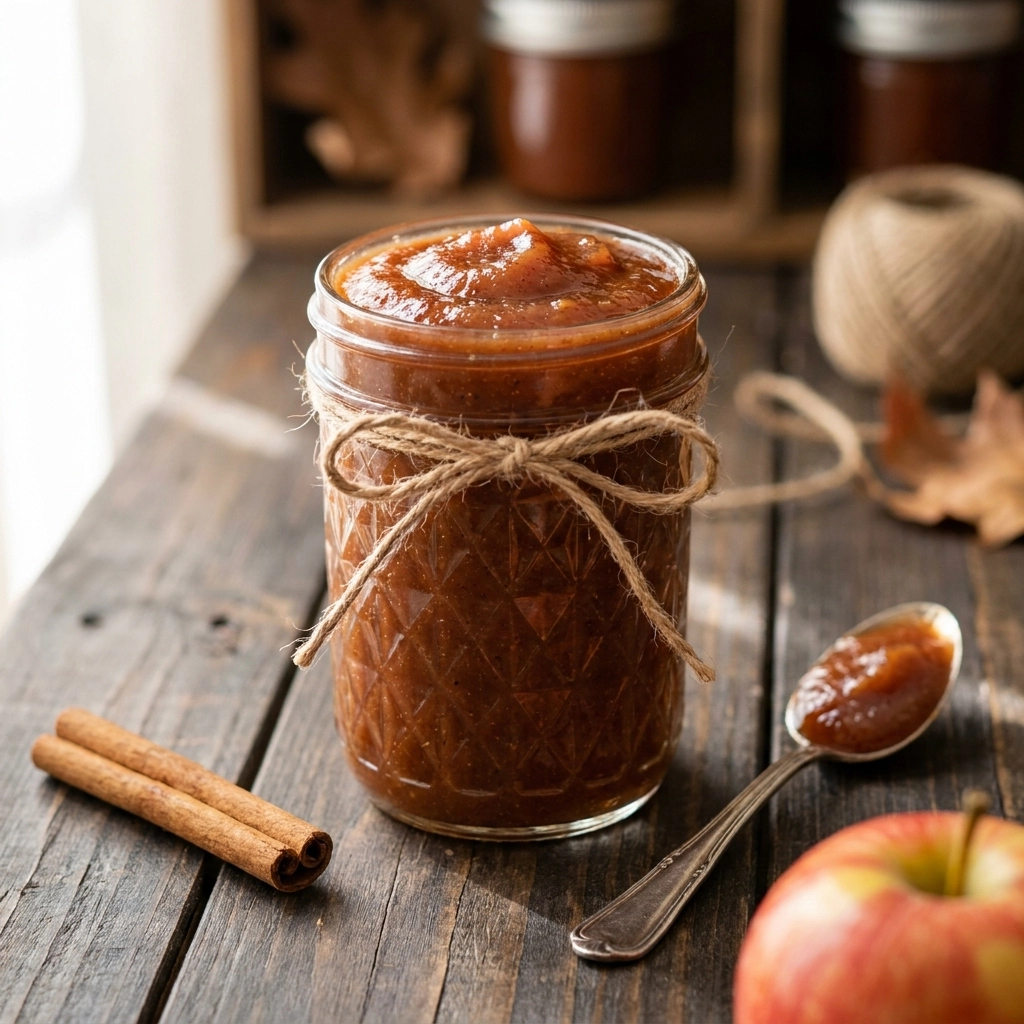
The Gold Standard of Autumn Spreads |
Listen closely: this is the only apple butter recipe you will ever need in your life because it masters the balance of deep caramelization and effortless preparation. Forget those old-fashioned methods that require you to stand over a simmering pot for eight hours straight, praying the bottom doesn’t burn while your kitchen turns into a humid sauna. We are utilizing the magic of pressure cooking to achieve a rich, concentrated flavor in a fraction of the time.
I almost gave up on this recipe until I realized that the secret wasn’t more time, but better temperature control within the Instant Pot’s sealed environment. For years, my attempts were either too watery or lacked that signature ‘dark’ depth, leaving me frustrated and tempted to just buy a jar from the store. Once I tweaked the apple-to-sugar ratio and embraced the saute function for the final reduction, everything clicked into place perfectly.
You can absolutely do this, even if you’ve never touched a pressure cooker before today. I am going to walk you through every single click and turn, ensuring that your home smells like a warm hug and your jars are filled with liquid gold. Trust the process, embrace the cinnamon aroma, and get ready to impress everyone at your next brunch gathering with a spread that tastes like it took all day.
- ●Zero constant stirring required compared to traditional stovetop methods.
- ●The pressure cooker infuses the spices deeper into the apple fibers.
- ●It uses simple pantry staples you likely already have on hand.
- ●Perfect for gifting in cute mason jars during the holiday season.
- ●Versatile enough to be a glaze, a topping, or a standalone snack.
Essential Ingredients |
Fuji or Gala Apples. I personally prefer Fuji because they hold their sweetness and structure beautifully; if you skip using a sweet apple and go for something tart like Granny Smith, your butter will be much more acidic and may require extra sugar.
Brown Sugar. Organic coconut sugar is a great alternative, but traditional packed brown sugar provides that molasses depth; skipping this means you lose the caramelized color and the rich, syrupy texture.
Apple Cider Vinegar. Bragg’s is my go-to brand here for purity; skipping the vinegar removes the necessary brightness that cuts through the sugar, leaving the butter tasting flat and one-dimensional.
Ground Cinnamon. Always use fresh, high-quality Saigon cinnamon for a punchier flavor; skipping this entirely would be a tragedy, as it is the primary soul of the recipe.
Ground Cloves. A tiny pinch of McCormick cloves adds a sophisticated warmth; if you skip this, the flavor remains simple and sweet rather than complex and artisanal.
 Let’s Make it Together |
- First things first, let’s get those apples prepped by peeling, coring, and chopping them into rough chunks—don’t worry about being precise here, as they’ll be blended later anyway!
- Now, go ahead and toss your apple chunks, brown sugar, cider vinegar, and all those aromatic spices right into the stainless steel inner pot of your Instant Pot.
- Give everything a quick stir just to make sure the sugar is distributed, then seal the lid and set your valve to the ‘Sealing’ position.
- Select the ‘Manual’ or ‘Pressure Cook’ button and set it for 20 minutes on High Pressure; now you can just relax while the machine does the heavy lifting.
- Once the timer beeps, let the pressure release naturally for about 10 minutes before you carefully flip the valve to vent the remaining steam.
- Open the lid and use an immersion blender right in the pot to whirl everything into a smooth puree, or transfer it to a standard blender if you prefer.
- Switch your pot to the ‘Saute’ function on medium heat and simmer the mixture for about 15 to 20 minutes, stirring occasionally until it thickens to your liking.
- Remove it from the heat once it reaches a spreadable consistency and let it cool slightly before transferring it to your storage jars.
It’s pure magic in a jar.
Never fill your Instant Pot more than halfway when cooking apples to avoid foam clogging the valve.
The mixture will look thinner than you expect when you first blend it, but it thickens significantly as it cools.
Avoid using a high-sugar apple variety if you are sensitive to sweetness, as the brown sugar adds a lot.
Always use a silicone spatula when simmering on the saute function to prevent scorching the bottom.
Be very careful when blending hot liquids to avoid steam burns from the blender lid.
Perfecting the Cooking Process |
Timing is everything when it comes to the final reduction phase. While the pressure cooking breaks down the fruit, the saute step is where the flavor concentrates and the water evaporates. If you stop too early, you’ll have apple sauce; if you go too long, it will become a sticky paste that is hard to spread.
Pay close attention to the bubbles during the reduction process. You are looking for ‘heavy’ bubbles that pop slowly, indicating that the sugars have caramelized and the consistency is just right. Keep the heat on medium to ensure you don’t burn the sugars, which would introduce a bitter taste to your beautiful butter.
Add Your Touch |
If you want to lean into a more sophisticated flavor profile, try adding a tablespoon of bourbon or dark rum during the final simmering stage. The alcohol cooks off, but it leaves behind a woody, complex note that pairs perfectly with a sharp cheddar cheese platter.
For those who love a bit of zest, grate in a teaspoon of fresh orange zest or add a pinch of ground ginger. These additions brighten the heavy sweetness of the apples and make the spread feel lighter and more contemporary.
Storing & Reheating |
When storing your apple butter, the refrigerator is your best friend, where it will stay fresh in an airtight glass jar for up to three weeks. For long-term preservation, the freezer is an excellent option; simply leave a bit of headspace in the jar to allow for expansion and freeze for up to six months. Always ensure the jar is completely cool before sealing to prevent condensation from forming, which can lead to premature mold growth.
To reheat your butter, the best method is a gentle microwave burst for 10-15 seconds or a quick stir in a small saucepan over low heat. Avoid boiling it again, as this can separate the sugars and change the texture. If you’ve frozen it, thaw the jar in the fridge overnight before attempting to reheat it for the smoothest consistency.
1Use a kitchen scale to measure your apples for the most consistent results every time.
2Strain your apple butter through a fine-mesh sieve if you want a professional, velvet-smooth finish.
3Add a pinch of salt to balance the sweetness and make the cinnamon pop.
4Wait until the butter is completely chilled before judging the final thickness.
5Sterilize your glass jars in boiling water to extend the shelf life in the fridge.
FAQ |
- ●Q: Can I use a different type of apple for this recipe?A: Yes, you certainly can use different varieties, but the result will vary. Using a tart apple like Granny Smith will result in a zesty, tangy butter that may require an extra two tablespoons of brown sugar to balance the acidity. Stick to Fuji, Gala, or Honeycrisp for that classic, sweet autumn flavor profile.
- ●Q: Why is my apple butter too runny after pressure cooking?A: It is completely normal for the mixture to be liquid after the pressure cooking phase because the apples release a lot of moisture. The critical step is the ‘Saute’ phase at the end, where you simmer the puree to evaporate excess water. If it’s still too thin, simply simmer it for another 10 minutes.
- ●Q: Do I really need to peel the apples?A: While you can leave the skins on if you have a high-powered blender, peeling them is highly recommended for this recipe. The skins can leave small, grainy bits in the final product, and peeling ensures that your apple butter has that luxurious, professional, and creamy texture that defines a true butter.
- ●Q: Can this be canned for long-term room temperature storage?A: This specific recipe is designed for refrigerator or freezer storage. To make it shelf-stable via water-bath canning, you would need to increase the acidity (usually with more lemon juice or vinegar) and follow strict canning safety guidelines to prevent botulism. For beginners, fridge storage is the safest and easiest path.
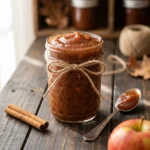
Cozy Instant Pot Apple Butter: The Ultimate Fall Comfort
- Total Time: 1 hour
- Yield: 3 cups 1x
Description
A rich, concentrated apple spread made quickly in the pressure cooker. Deeply spiced and perfectly caramelized for autumn toast or desserts.
Ingredients
- 3 lbs Fuji or Gala apples, peeled and chopped
- 1/2 cup packed brown sugar
- 2 tbsp apple cider vinegar
- 1 tbsp ground cinnamon
- 1/4 tsp ground cloves
- 1/4 tsp salt
Instructions
- Place chopped apples, brown sugar, vinegar, and spices into the Instant Pot.
- Secure the lid and set the valve to Sealing.
- Pressure cook on High for 20 minutes.
- Allow a 10-minute natural pressure release, then vent remaining steam.
- Blend the mixture using an immersion blender until smooth.
- Turn on the Saute function on medium heat and simmer for 15-20 minutes until thickened.
- Cool completely before transferring to jars.
- Prep Time: 15 minutes
- Cook Time: 45 minutes
- Category: Condiment
- Method: Pressure Cooking
- Cuisine: American