Imagine a sad, soggy tater tot casserole where the potatoes have surrendered their will to be crispy. It is a culinary tragedy of damp starch and lukewarm cheese.
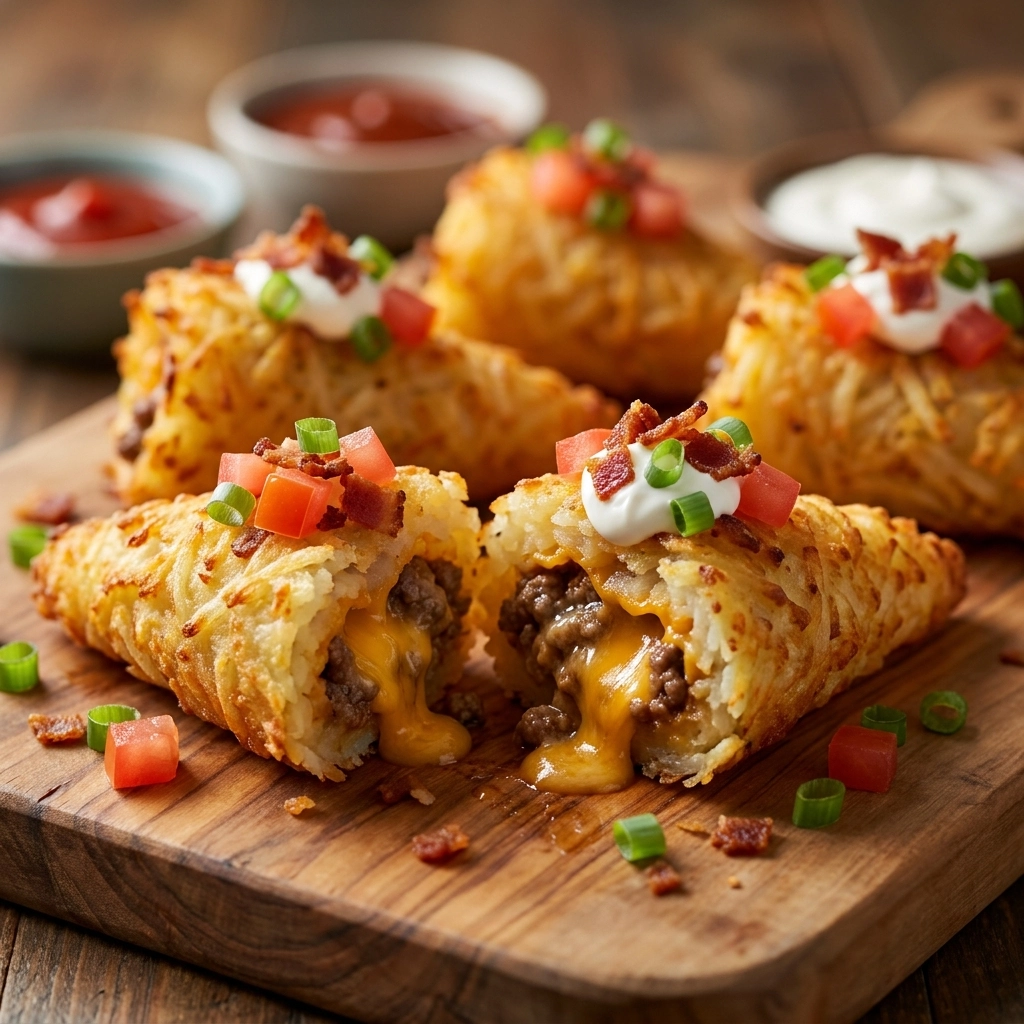
Now, picture the opposite: a golden, crunchy cone of potato holding a molten core of seasoned beef. The sound of sizzling meat hitting the pan is the only invitation you need to start this journey.
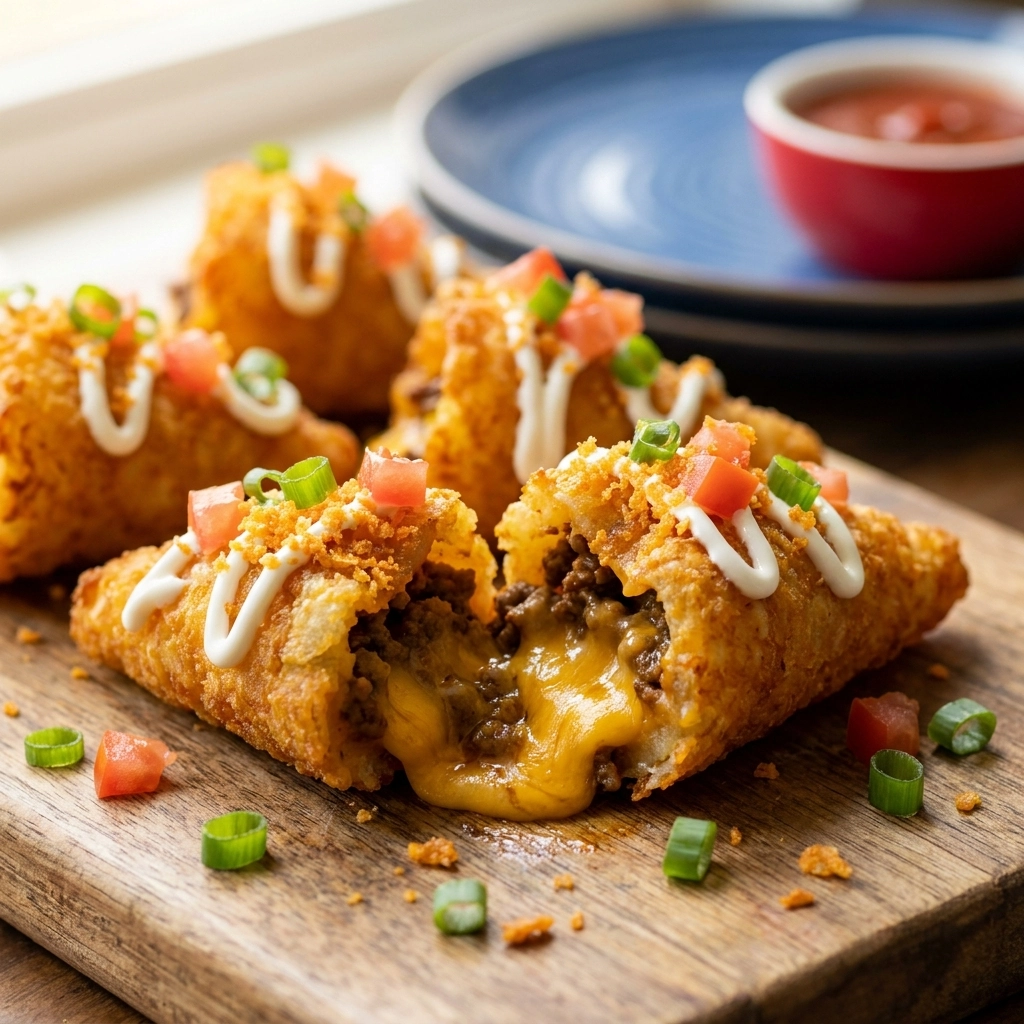
These Cheeseburger Stuffed Tater Tot Cones are essentially a handheld party in your mouth. They take the soul of a classic burger and wrap it in a potato hug.
Most people love them because they solve the eternal struggle of eating a burger without a mess. You get the crunch, the salt, and the savory beef in one efficient package.
While store-bought frozen appetizers feel like cardboard, these homemade versions taste like a backyard BBQ had a baby with a carnival snack. They are tactile, indulgent, and slightly chaotic.
This recipe is perfect for anyone who believes that potato-based vessels are the superior way to consume protein. If you enjoy bold flavors, try our Cheeseburger Tater Tot Casserole The Ultimate Comfort Food Easy Family Dinner
Let us dive into the details of how to build these crispy masterpieces.
- ●Why You’ll Love This Recipe
- ●A Brief Background / Why This Recipe Works
- ●Perfect For Game Day and Family Cravings
- ●Main Ingredient Spotlight: Tater Tots
- ●Secondary Ingredient Spotlight: Cheddar Cheese
- ●Key Ingredients
- ●How to Make It
- ●Pro Tips
- ●Delicious Variations
- ●Best Ways to Serve
- ●Storage and Leftovers
- ●Frequently Asked Questions
- ●Why This Recipe Belongs in Your Weekly Rotation
- ●Final Thoughts
There is something psychologically satisfying about food that comes in a cone shape. Beyond the novelty, these bites deliver a concentrated blast of savory flavor that hits every taste bud.
- ●Handheld convenience makes them the ultimate party food.
- ●The contrast between the crisp potato shell and juicy filling is elite.
- ●They use simple pantry staples you likely already have.
- ●Kids actually eat their “vegetables” because potatoes count in their minds.
- ●Customizable fillings allow you to sneak in diced onions or peppers.
- ●They look far more impressive than they are difficult to make.
- ●The melted cheese creates a natural seal for the beef filling.
- ●They are significantly less messy than traditional sliders.
- ●Perfect for those who crave comfort food with a modern twist.
Once you experience the crunch of a properly baked tot cone, you will never look at a standard burger the same way again. For more potato-based magic, check out The Ultimate Cheesy Pizza Tot Casserole Recipe Easy Tater Tot Casserole
A Brief Background / Why This Recipe Works |
The concept relies on the structural integrity of the frozen tater tot. When pressed into a muffin tin or cone mold, the starch bonds together under heat, creating a sturdy edible bowl.
But here’s the thing: the fat from the ground beef seeps slightly into the potato wall, seasoning the shell from the inside out. This creates a layered flavor profile where no part of the bite is bland.
That’s exactly why the ratio of beef to cheese is so critical. Too much beef leads to a leak, while too much cheese can make the base soggy. Finding that sweet spot is where the magic happens.
Ultimately, this recipe works because it combines the three pillars of American comfort: potatoes, beef, and melted cheese.
Perfect For Game Day and Family Cravings |
These cones are a godsend for busy weeknights when you want something that feels like a treat but doesn’t require a three-course setup. They satisfy the “I want fast food” urge while remaining homemade.
For meal prep, you can assemble the beef filling in advance and just pop the cones in the oven when guests arrive. This saves you from being trapped in the kitchen during the big game.
Family dinners benefit from the interactive nature of these snacks. Let the kids help fill the cones with their favorite toppings to make them feel like miniature chefs.
During holiday parties, these serve as a sophisticated alternative to a standard platter of chips and dip. They provide a hearty base that keeps guests full and happy.
Main Ingredient Spotlight: Tater Tots |
The humble tater tot is the unsung hero of the freezer aisle. In this recipe, they provide the essential structural foundation and a salty, starchy crunch that balances the rich beef.
Their uniform shape allows for consistent baking, ensuring that every cone reaches that golden-brown state without burning. Because they are pre-fried, they maintain their shape better than raw mashed potatoes would.
Secondary Ingredient Spotlight: Cheddar Cheese |
Cheddar cheese is the glue that holds this entire operation together. Its sharp tang cuts through the richness of the beef, providing a necessary acidic contrast.
Moreover, the melting properties of cheddar create a gooey barrier that prevents the meat from drying out during the second bake. It transforms the filling from a pile of meat into a cohesive, molten center.
If you enjoy other savory fillings, you might like Cheesy Shepherds Pie Tater Tot Casserole Easy Family Dinner Recipe
Key Ingredients |
Gather these essentials to ensure your cones have the perfect balance of salt, fat, and crunch.
- ●Tater Tots — These create the crispy, golden outer shell of the cone.
- ●Ground Beef — This provides the hearty, savory protein center.
- ●Sharp Cheddar Cheese — This adds a salty punch and acts as the binding agent.
- ●Onion Powder — This delivers a concentrated savory depth without adding moisture.
- ●Garlic Powder — This enhances the beef and adds a classic aromatic note.
- ●Worcestershire Sauce — This introduces a complex, umami richness to the meat.
- ●Salt and Pepper — These are the fundamental seasonings used to brighten all other flavors.
 How to Make It |
Follow these steps carefully to avoid the dreaded “tot-collapse” and ensure maximum crispiness.
- Prep the shells: Grease a mini-muffin tin thoroughly with non-stick spray. Press 3-4 tater tots into each cup, pushing them up the sides to form a small bowl. Avoid over-packing them, or the center won’t cook through.
- The first bake: Bake the empty tot shells at 400°F for about 10-12 minutes. You are looking for them to set and turn a light gold. If you skip this, the shells will collapse the moment you add the filling.
- Brown the beef: Heat a skillet over medium-high heat. Add the ground beef and cook until fully browned, listening for that aggressive sizzle. Drain the excess grease carefully so your cones don’t become oil slicks.
- Season the filling: Stir in the onion powder, garlic powder, salt, pepper, and Worcestershire sauce. Sauté for another 2 minutes until the aromas are fragrant. This ensures the flavor is locked into the meat rather than just sitting on top.
- The cheese layer: Place a small pinch of shredded cheddar at the bottom of each pre-baked tot shell. This creates a “cheese plug” that prevents the meat juices from soaking through the bottom.
- Stuff the cones: Spoon the seasoned beef into each shell, filling them nearly to the brim. Top with another generous layer of cheddar cheese. If you overfill them, the cheese will spill over and burn on the pan.
- The final melt: Return the tin to the oven for 5-8 minutes. Watch for the cheese to bubble and the edges of the tots to turn a deep, golden brown. This final step fuses the shell and filling into one unit.
1A few small tweaks can elevate these from “good” to “legendary.” For more filling ideas, see Cheesy Buffalo Chicken Tater Tot Casserole Recipe Easy Game Day Appetizer
- ●2Use Extra-Crispy Tots: Look for brands labeled “extra crispy” as they hold their shape better under the weight of the beef.
- ●3Drain the Meat Well: Use a colander or paper towels to remove every bit of excess fat from the beef to prevent soggy bottoms.
- ●4Freshly Grated Cheese: Avoid pre-shredded cheese if possible; the cornstarch coating on bagged cheese prevents it from melting as smoothly.
- ●5Avoid Over-Baking: Keep a close eye on the final stage; tater tots can go from golden to burnt in about sixty seconds.
- ●6Cool Before Removing: Let the cones sit in the pan for 3 minutes after baking. This allows the cheese to set slightly, making them easier to lift out.
Delicious Variations |
While the classic cheeseburger is king, these shells are versatile enough to handle almost any filling.
- ●Bacon BBQ: Add cooked bacon bits to the beef and a drizzle of BBQ sauce on top before the final bake.
- ●Jalapeño Popper: Mix diced jalapeños and cream cheese into the beef for a spicy kick.
- ●Mushroom Swiss: Swap the cheddar for Swiss cheese and add sautéed mushrooms to the beef mixture.
- ●Breakfast Style: Replace beef with breakfast sausage and top with a tiny piece of scrambled egg.
- ●Veggie Delight: Use plant-based crumbles and a vegan cheddar alternative for a meatless version.
No matter which version you choose, the golden potato shell remains the star of the show.
Best Ways to Serve |
Serving these is all about the dipping sauce. Because they are handheld, they are practically begging to be dunked into something creamy or tangy.
- ●Special Sauce: A blend of mayo, ketchup, mustard, and minced pickles is the gold standard.
- ●Spicy Aioli: Mix sriracha with garlic mayo for a modern, zesty contrast.
- ●Ranch Dip: A classic buttermilk ranch provides a cool balance to the hot, seasoned beef.
- ●Warm Beer Cheese: For a truly indulgent experience, serve these with a side of melted beer cheese.
For a complete meal, pair these cones with a crisp side salad or some steamed broccoli. The freshness of the vegetables cuts through the richness of the cheese and beef.
If you enjoy other stuffed creations, you might appreciate the Irresistible Chicken Stuffed With Pears And Cheese Recipe
Storage and Leftovers |
Refrigerating
Store leftover cones in an airtight container for up to 4 days. Ensure they are completely cooled before sealing to prevent steam from making the shells soggy. Place a piece of parchment paper between layers to prevent sticking.
Reheating
Avoid the microwave at all costs, as it will turn your crispy cones into mushy sponges. Instead, reheat them in an oven or air fryer at 350°F for 5-7 minutes. This restores the crunch of the tater tots while melting the cheese once more.
Freezing
You can freeze fully cooked cones for up to 2 months. Flash-freeze them on a baking sheet for an hour before transferring them to a freezer bag. To reheat from frozen, simply pop them in the air fryer at 375°F for 8-10 minutes until steaming hot.
Frequently Asked Questions |
- ●Q: Can I use a regular muffin tin instead of a mini one?A: Yes, you can use a standard muffin tin, but you will need to use significantly more tater tots to build the walls. Keep in mind that the larger surface area may result in a softer center, so you might need to increase the first bake time by a few minutes.
- ●Q: My tater tot shells keep collapsing; what am I doing wrong?A: This usually happens because the shells weren’t pre-baked long enough or were overfilled. Ensure the tots are pressed firmly against the walls of the tin and that they have reached a light golden color before adding the beef and cheese.
- ●Q: Can I make these in an air fryer?A: You can, provided you have air-fryer-safe silicone molds or small ramekins. Arrange the tots in the mold and air fry at 400°F for 8 minutes, fill them, and then air fry for another 5 minutes. This method often results in even crispier edges.
- ●Q: What is the best beef-to-fat ratio for this recipe?A: I highly recommend using 80/20 or 85/15 lean ground beef. While 90/10 is healthier, it can result in a dry filling that lacks the rich, burger-like flavor. If using 80/20, just be sure to drain the grease thoroughly after browning.
- ●Q: Can I add fresh vegetables like onions and peppers to the filling?A: Absolutely, but make sure you sauté them until the moisture has completely evaporated. Fresh vegetables release water during baking, which can seep into the potato shell and ruin the crunch. Cook them down with the beef until they are soft and browned.
Why This Recipe Belongs in Your Weekly Rotation |
Life is too short to eat boring dinners. These cones turn a standard Tuesday night into an event, providing a level of excitement that a basic sandwich simply cannot match.
Moreover, the efficiency of the recipe is unmatched. starch and the protein into one vessel, you eliminate the need for multiple side dishes and reduce the amount of cleanup required.
Whether you are feeding picky teenagers or hosting a group of adults, these bites are a guaranteed hit. They prove that comfort food can be creative, portable, and utterly delicious.
Final Thoughts |
These Cheeseburger Stuffed Tater Tot Cones are the perfect marriage of crunch, salt, and savory beef. By using a simple pre-bake technique, you create a sturdy vessel that holds a molten cheeseburger center perfectly.
You should make these because they bring a sense of playfulness back to the kitchen while delivering a hearty, satisfying meal. They are a versatile solution for parties or a cozy night in with the family.
Stop settling for soggy appetizers and treat yourself to the golden, crispy glory of these tater tot masterpieces today!

Cheeseburger Stuffed Tater Tot Cones: The Ultimate Party Snack
- Total Time: 40 minutes
- Yield: 12 cones 1x
Description
A handheld twist on the classic cheeseburger, featuring a crispy tater tot shell filled with seasoned ground beef and melted cheddar cheese.
Ingredients
- 1 bag frozen tater tots
- 1 lb ground beef
- 2 cups shredded sharp cheddar cheese
- 1 tsp onion powder
- 1 tsp garlic powder
- 1 tbsp Worcestershire sauce
- Salt and pepper to taste
Instructions
- Preheat oven to 400F and grease a mini-muffin tin.
- Press 3-4 tater tots into each cup to form a shell and bake for 10-12 minutes.
- Brown ground beef in a skillet over medium-high heat and drain excess grease.
- Stir in onion powder, garlic powder, salt, pepper, and Worcestershire sauce.
- Place a pinch of cheese in the bottom of each pre-baked shell.
- Fill shells with seasoned beef and top with remaining cheese.
- Bake for another 5-8 minutes until cheese is bubbly and tots are golden brown.
- Prep Time: 15 minutes
- Cook Time: 25 minutes
- Category: Appetizer
- Method: Baking
- Cuisine: American


