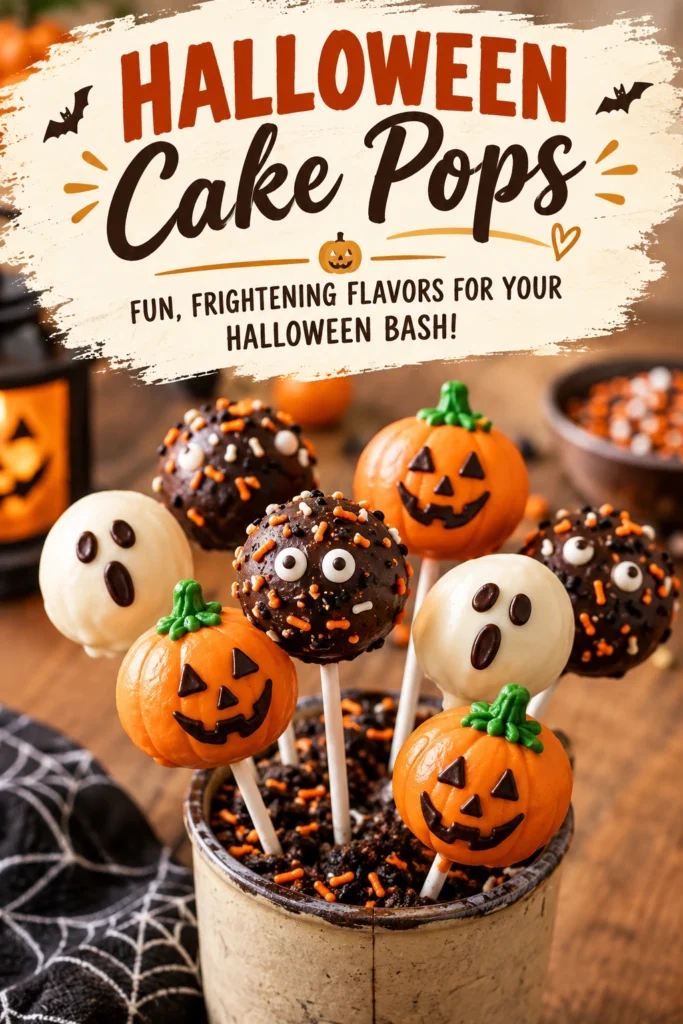
A bright orange candy shell snaps under your teeth to reveal a dense, moist cake center. These treats offer a concentrated burst of sweetness that makes them a hit at any seasonal gathering.
Halloween cake pops are bite-sized spheres of crumbled cake mixed with frosting and dipped in melted chocolate. They turn leftover cake into a handheld dessert that looks professional on a platter.
Guests appreciate the portability of these treats, as they do not require plates or forks. They allow for endless creative decorating, from ghostly whites to blood-red drips.
Unlike store-bought versions, homemade pops allow you to control the sugar levels and choose high-quality chocolate for a richer taste.
This recipe suits parents hosting school parties or hosts looking for a visually striking addition to a dessert table. They pair well with Spooky Halloween Brownies Delightful Treats For Fun Easy Halloween Dessert Ideas
Follow these steps to create a batch of frighteningly good sweets for your guests.
- ●Why You’ll Love This Recipe
- ●A Brief Background on Cake Pops
- ●Perfect For Spooky Parties and Festive Gatherings
- ●Main Ingredient Spotlight: Chocolate
- ●Secondary Ingredient Spotlight: Frosting
- ●Key Ingredients
- ●How to Make It
- ●Pro Tips
- ●Flavor Variations
- ●Best Ways to Serve
- ●Storage and Leftovers
- ●Frequently Asked Questions
- ●Why This Recipe Belongs in Your Weekly Rotation
- ●Final Thoughts
These cake pops provide a versatile way to use every bit of your baked goods while adding a festive touch to your table.
- ●Concentrated flavor in every single bite
- ●No need for expensive cake decorating tools
- ●Customizable colors to match any Halloween theme
- ●Portion control for guests who want a small treat
- ●Reduced waste scraps
- ●Quick cleanup since they are served on sticks
- ●Kid-friendly activity during the decorating phase
- ●Longer shelf life than a whole sliced cake
- ●Visually striking presentation on a tiered tray
- ●Adaptable to various cake flavors like red velvet or carrot
Once you master the ratio of cake to frosting, you can make these for any holiday of the year.
A Brief Background on Cake Pops |
Cake pops emerged as a trend that bridged the gap between a traditional cake and a truffle. the cake and recombining it with a binder, the texture becomes denser and more fudge-like.
The addition of a stick transforms the experience from a plated dessert to a finger food. This shift makes them ideal for high-traffic events where guests are mingling and moving around.
Using colorful coatings allows for thematic storytelling, turning a simple dessert into a miniature piece of art.
Perfect For Spooky Parties and Festive Gatherings |
These treats fit seamlessly into a themed dessert spread. Whether you are hosting a neighborhood costume contest or a small family movie night, these pops add a professional look without requiring a bakery budget.
They are especially useful for holiday meal prep because the cake bases can be formed a day in advance. This leaves only the dipping and decorating for the day of the event.
For those preparing a wide array of sweets, these can be served alongside Delicious Edible Gummy Eyeballs For Halloween Fun Spooky Halloween Treats to create a diverse texture palette.
Main Ingredient Spotlight: Chocolate |
Chocolate acts as both the structural shell and the primary flavor profile. Using a high-quality melting chocolate or candy melts provides a smooth finish that hardens quickly at room temperature.
The fat content in the chocolate creates a barrier that keeps the inner cake moist. When tempered correctly, the chocolate provides a satisfying snap that contrasts with the soft interior.
Secondary Ingredient Spotlight: Frosting |
Frosting serves as the glue for this recipe. It binds the cake crumbs together, preventing the pops from cracking or falling off the stick.
A buttercream or cream cheese frosting works best because it provides enough stability without making the cake feel greasy. The sugar in the frosting also helps preserve the cake crumbs moisture.
Key Ingredients |
Gather these components to ensure your cake pops hold their shape and taste rich.
- ●Baked Cake — provides the base structure and primary flavor
- ●Frosting — acts as the binding agent to hold the crumbs together
- ●Candy Melts — creates the hard, colorful outer shell
- ●Lollipop Sticks — allows for easy handling and presentation
- ●Sprinkles — adds texture and visual detail to the exterior
- ●Cooking Oil — prevents the chocolate from sticking to the dipping bowl
How to Make It |
Creating the correct consistency is the most important part of this process to avoid pops that slide off their sticks.
- Crumble the cake: Break your cooled cake into small pieces in a large mixing bowl. Use your hands or a fork to remove all large chunks until the texture resembles fine sand. This ensures a smooth, uniform sphere without lumps.
- Bind with frosting: Add the frosting one tablespoon at a time, mixing gently with a spatula. Stop adding frosting as soon as the mixture holds its shape when squeezed. Adding too much frosting results in a greasy texture that will cause the pops to slide down the stick.
- Roll the spheres: Scoop about one tablespoon of mixture and roll it between your palms into a smooth ball. Ensure there are no cracks on the surface. Chill the balls in the refrigerator for 20 to 30 minutes; skipping this step leads to the cake softening too much when it hits the warm chocolate.
- Secure the sticks: Melt a small amount of chocolate in a microwave-safe bowl. Dip the tip of a lollipop stick into the melted chocolate, then insert it halfway into a chilled cake ball. The chocolate acts as an anchor, securing the ball to the stick.
- Coat the pops: Dip the cake ball straight down into the melted chocolate until completely covered. Lift the pop and gently tap your wrist to shake off excess chocolate. Avoid swirling the pop too much, which can create unsightly ridges or air bubbles.
- Decorate and set: Immediately add sprinkles or candies before the shell hardens. Place the pops upright in a styrofoam block or a decorated cardboard holder. Let them set for at least 30 minutes at room temperature or 15 minutes in the fridge.
1Refining your technique will result in a cleaner look and better stability.
- ●2Avoid overheating chocolate: Microwave candy melts in 15-second bursts, stirring between each, to prevent the chocolate from seizing or burning.
- ●3Control the frosting ratio: If the mixture feels too wet, stir in a few more cake crumbs to thicken it.
- ●4Use a room temperature environment: High humidity can prevent the chocolate shell from hardening properly.
- ●5Smooth the bottoms: Gently rotate the pop after dipping to ensure the bottom is rounded and doesn’t have a chocolate drip.
- ●6Chill thoroughly: Ensure the cake balls are cold to the touch before dipping to prevent them from melting into the chocolate.
Flavor Variations |
You can adapt these pops to suit different taste preferences or dietary needs.
- ●Red Velvet Terror: Use red velvet cake and cream cheese frosting for a deep red interior.
- ●Pumpkin Spice Ghoul: Use pumpkin cake and cinnamon frosting for a seasonal autumn flavor.
- ●Dark Chocolate Void: Use chocolate cake and chocolate frosting, dipped in black candy melts.
- ●White Chocolate Ghost: Use vanilla cake and white chocolate coating for a ghostly appearance.
- ●Vegan Alternative: Use a dairy-free cake and coconut-based frosting with vegan chocolate melts.
Experimenting with different cake bases allows you to create a variety of flavors for one party.
Best Ways to Serve |
Presentation is key for Halloween treats, turning a simple dessert into a centerpiece.
- ●Arrange them in a themed cake pop stand or a carved pumpkin.
- ●Place them in a clear glass jar with orange shredded paper at the bottom.
- ●Create a “graveyard” layout on a platter using crushed chocolate cookies as dirt.
For a more elaborate spread, combine these with Bewitching Witches Fingers Cookies For Halloween Fun Spooky Halloween Treats for a variety of spooky shapes.
Serving them on individual napkins helps guests move around the party without needing a plate. Ensure the platter is kept in a cool area to prevent the chocolate from softening.
Storage and Leftovers |
Refrigerating
Store cake pops in an airtight container in the refrigerator for up to 7 days. Keep them upright to avoid flattening the chocolate shells.
Reheating
Do not reheat these treats in a microwave, as the chocolate will melt and the cake may become rubbery. Allow them to come to room temperature for 20 minutes before serving for the best texture.
Freezing
Wrap individual pops in parchment paper and place them in a freezer-safe bag for up to 3 months. Thaw them slowly in the refrigerator overnight before serving.
Frequently Asked Questions |
- ●Q: Why do my cake pops keep falling off the sticks?A: This usually happens if the cake balls were not chilled long enough or if too much frosting was used. The frosting makes the cake too soft, and without a cold core, the ball cannot grip the stick. Ensure you use a small amount of melted chocolate as a glue on the stick before inserting it.
- ●Q: Can I use regular chocolate bars instead of candy melts?A: You can use chocolate bars, but you must add a small amount of shortening or coconut oil to the melted chocolate. This helps the chocolate flow more smoothly and prevents it from cracking when it hardens. Candy melts are designed specifically for this purpose and provide a more consistent finish.
- ●Q: How do I fix chocolate that has seized and become lumpy?A: Seized chocolate occurs when a small amount of water enters the mix. You can sometimes fix it by adding a teaspoon of vegetable oil or heavy cream and stirring slowly over very low heat. If it is completely clumpy, it is best to start over with fresh chocolate.
- ●Q: What is the best cake to use for these pops?A: A dense cake, such as a pound cake or a standard butter cake, works best because it provides a sturdy structure. Very airy cakes, like angel food cake, may require more frosting to bind, which can compromise the stability of the pop.
- ●Q: How can I get the smoothest possible chocolate coating?A: The secret is to dip the pop straight down and lift it straight up. Once the pop is out of the chocolate, gently tap your wrist or the stick against the side of the bowl to shake off excess chocolate before it sets.
Why This Recipe Belongs in Your Weekly Rotation |
While typically associated with Halloween, the technique used here is a great way to handle leftover cakes from birthdays or celebrations. Instead of letting a cake go stale, you can transform it into a fresh, portable treat.
The ability to customize flavors and colors makes this a go-to for any event. From ba office parties, the format is always a crowd-pleaser.
Incorporating this into your baking repertoire reduces food waste and introduces a fun, creative element to your kitchen. It is a rewarding process that yields high-impact results with simple ingredients.
Final Thoughts |
These Halloween cake pops combine a rich, fudgy interior with a crisp chocolate shell. They offer a customizable way to create festive, handheld desserts for any autumn celebration.
Making these at home allows for better ingredient control and a personalized touch that store-bought treats lack. They are an efficient way to use cake scraps while impressing guests with a polished presentation.
Gather your candy melts and cake crumbs to bring some spooky sweetness to your next party.
Halloween Cake Pops: Fun, Frightening Flavors for Your Halloween Bash!
- Total Time: 45 minutes
- Yield: 24 cake pops 1x
Description
Bite-sized cake spheres blended with frosting and dipped in vibrant Halloween-themed chocolate coatings. A portable and visually striking dessert for any spooky celebration.
Ingredients
- 6 cups crumbled baked cake
- 1/2 cup buttercream frosting
- 12 oz orange candy melts
- 12 oz purple candy melts
- 24 lollipop sticks
- 1/4 cup Halloween sprinkles
- 1 tablespoon vegetable oil
Instructions
- Crumble the baked cake into a large bowl until no large lumps remain.
- Stir in frosting one tablespoon at a time until the mixture can be rolled into a ball without cracking.
- Roll the mixture into 24 equal-sized balls and refrigerate for 30 minutes.
- Melt candy melts in a microwave-safe bowl in 15-second intervals, stirring in vegetable oil for smoothness.
- Dip the tip of a lollipop stick into melted chocolate and insert it halfway into a chilled cake ball.
- Dip the entire ball into the chocolate, lift straight up, and tap the wrist to remove excess.
- Add sprinkles immediately and place the pops in a stand to set for 30 minutes.
- Prep Time: 45 minutes
- Cook Time: 0 minutes
- Category: Dessert
- Method: No-Bake
- Cuisine: American