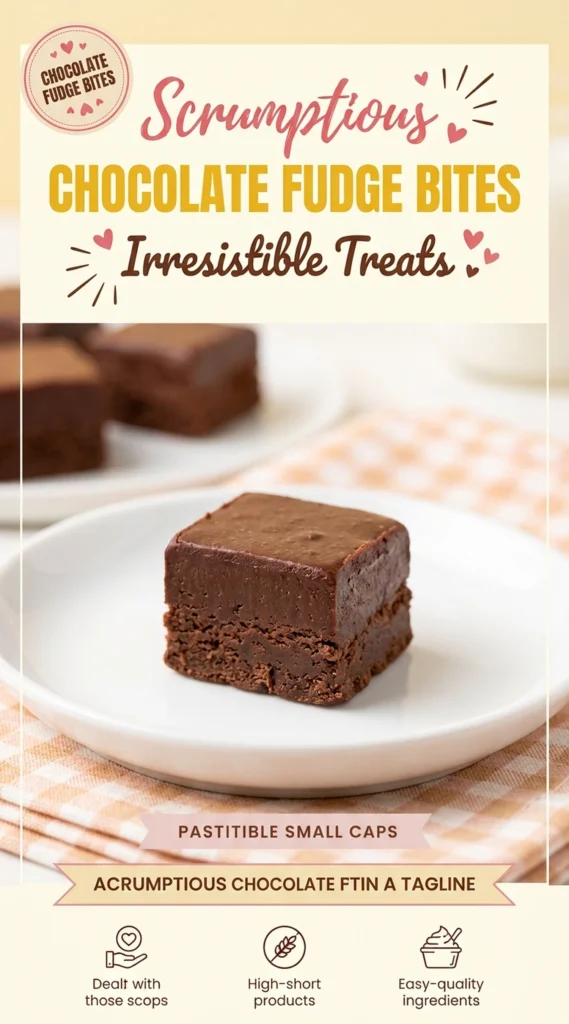
Finding a dessert that satisfies a deep chocolate craving without requiring hours in the kitchen can be a challenge. Most homemade fudge requires precise temperature control and a lot of patience to avoid graininess.
These chocolate fudge bites offer a streamlined solution for those who want a decadent treat immediately. They are dense, rich, and remarkably smooth.
Readers love this recipe because it removes the stress of a candy thermometer while maintaining a professional texture. It is a reliable way to get a high-end result with minimal equipment.
A key feature that distinguishes this version is the addition of a touch of espresso powder, which deepens the cocoa profile without making the fudge taste like coffee.
Unlike store-bought fudge, which often contains waxier fats and an overwhelming amount of corn syrup, these bites rely on high-quality chocolate and butter for a clean melt.
This recipe is ideal for beginner bakers, busy parents, or anyone who needs a crowd-pleasing platter for a holiday gathering.
The following guide details every step to ensure your fudge is perfectly set and flavorful.
- ●Why You’ll Love This Recipe
- ●A Brief Background / Why This Recipe Works
- ●Perfect For Dessert Platters and Gifting
- ●Main Ingredient Spotlight: Semi-Sweet Chocolate
- ●Secondary Ingredient Spotlight: Condensed Milk
- ●Key Ingredients
- ●How to Make It
- ●Pro Tips
- ●Delicious Variations
- ●Best Ways to Serve
- ●Storage and Leftovers
- ●Frequently Asked Questions
- ●Why This Recipe Belongs in Your Weekly Rotation
- ●Final Thoughts
This fudge stands out because it balances intense cocoa notes with a creamy finish that doesn’t feel greasy.
- ●No candy thermometer is required to reach the correct stage.
- ●The prep time is minimal, making it a fast solution for last-minute guests.
- ●Small bite-sized portions make it easy to control the richness.
- ●The texture is consistently smooth rather than crumbly or gritty.
- ●High-quality chocolate creates a natural gloss on each square.
- ●It pairs exceptionally well with a Irresistible Juicy Peppermint Hot Chocolate Recipe
- ●The ingredients are common pantry staples found in most kitchens.
- ●It stays fresh in the refrigerator for over a week.
These bites provide a sophisticated dessert experience with very little effort involved in the process.
A Brief Background / Why This Recipe Works |
Traditional fudge relies on the crystallization of sugar to create its signature bite. This process can be finicky, as a single stray sugar crystal can cause the entire batch to become grainy.
This specific method uses sweetened condensed milk to act as a stabilizer. The milk proteins and sugars prevent the chocolate from separating and stop large crystals from forming, resulting in a velvety consistency.
The ratio of fat from the butter to the solids in the chocolate creates a structure that is firm at room temperature but melts quickly on the tongue.
Perfect For Dessert Platters and Gifting |
These treats are ideal for holiday platters where a variety of sweets are presented. Their stable structure means they won’t melt quickly when sitting on a table next to other desserts like Tempting Salted Chocolate Brownie Bites Recipe
Because they are easy to wrap in parchment paper and place in small tins, they make thoughtful, homemade gifts for teachers, coworkers, or neighbors.
During family gatherings, these bites serve as a convenient finger food that doesn’t require plates or silverware, reducing the cleanup time after a party.
Main Ingredient Spotlight: Semi-Sweet Chocolate |
Semi-sweet chocolate provides the essential structural base and the primary flavor profile. It contains a higher percentage of cocoa solids than milk chocolate, which prevents the fudge from becoming cloyingly sweet.
The cocoa butter within the chocolate is what allows the fudge to set firmly. When cooled, it creates a snap that gives way to a creamy interior, providing a satisfying sensory contrast.
Secondary Ingredient Spotlight: Condensed Milk |
Sweetened condensed milk is the secret to the fudge’s smoothness. It replaces the need for boiling sugar and water, acting as both the sweetener and the thickening agent.
The reduced water content in the milk concentrates the flavor and ensures the fudge doesn’t become too soft. It bonds with the melted chocolate to create a cohesive, dense mass that is easy to slice into clean cubes.
Key Ingredients |
Each component plays a specific role in achieving the final texture and taste of the fudge.
- ●Semi-sweet chocolate chips — Provides the deep chocolate flavor and the structure needed for the fudge to set.
- ●Sweetened condensed milk — Adds creaminess and sweetness while preventing sugar crystallization.
- ●Unsalted butter — Contributes a rich, silky mouthfeel and a slight golden sheen to the finished bites.
- ●Vanilla extract — Enhances the chocolate notes and adds a floral aromatic quality.
- ●Espresso powder — Intensifies the cocoa flavor and adds a subtle complexity.
- ●Salt — Balances the sugar and prevents the chocolate from tasting flat.
How to Make It |
Follow these steps carefully to ensure a smooth melt and a perfect set.
- Prepare the pan: Line an 8×8 inch baking pan with parchment paper, leaving an overhang on the sides. This allows you to lift the entire block of fudge out of the pan easily once it has set.
- Combine chocolate and milk: Place the chocolate chips and sweetened condensed milk in a microwave-safe bowl or a double boiler. Ensure the chocolate is evenly distributed in the milk to avoid hot spots.
- Melt the mixture: Heat the combination in 30-second intervals in the microwave, stirring thoroughly between each burst. If using a double boiler, stir constantly over low heat until the chocolate is completely melted and the mixture is glossy. Avoid overheating, as this can cause the chocolate to seize.
- Incorporate fats and flavor: Stir in the butter, vanilla extract, espresso powder, and salt while the mixture is still hot. The butter should melt instantly, creating a smooth, uniform emulsion that smells richly of vanilla and cocoa.
- Transfer to pan: Pour the melted fudge into the prepared pan and use a spatula to smooth the top into an even layer. This prevents some areas from being thicker than others, which would result in uneven cutting.
- Set the fudge: Refrigerate the pan for at least two hours, or until the fudge is firm to the touch. Do not attempt to cut the fudge while it is still warm, as the squares will lose their sharp edges.
- Cut into bites: Lift the fudge out of the pan using the parchment paper. Use a sharp knife to slice the block into small, uniform squares. For the cleanest cuts, wipe the knife with a warm, damp cloth between slices.
1Small adjustments in technique can lead to a more professional result.
- ●2Use high-quality chocolate: Avoid low-grade chocolate with high vegetable oil content, as it will not set firmly.
- ●3Avoid water contact: Ensure all bowls and spatulas are completely dry, as a single drop of water can cause the chocolate to seize and clump.
- ●4Stir gently: Use a folding motion when adding the vanilla and salt to avoid incorporating too many air bubbles into the fudge.
- ●5Chill the knife: Placing your knife in the freezer for five minutes before cutting helps create perfectly sharp edges on each bite.
- ●6Sift the espresso powder: If your espresso powder is clumpy, sift it through a fine-mesh strainer to ensure it distributes evenly.
Delicious Variations |
Once you have mastered the basic recipe, you can experiment with different add-ins to customize the flavor.
- ●Nutty Crunch: Stir in toasted walnuts or pecans during the final mixing stage for added texture.
- ●Sea Salt Topping: Sprinkle flaky sea salt over the top of the fudge before refrigerating for a salted-chocolate finish.
- ●Peanut Butter Swirl: Melt a small amount of peanut butter and swirl it into the top of the fudge with a toothpick.
- ●Dried Fruit: Fold in chopped dried cranberries or orange peel for a tart contrast to the rich chocolate.
- ●White Chocolate Marble: Melt a handful of white chocolate chips separately and swirl them into the dark mixture.
These additions allow you to transform a simple treat into something tailored for specific holidays or taste preferences.
Best Ways to Serve |
Presentation enhances the experience of these rich treats.
- ●Arrange the bites on a slate platter with fresh raspberries and sliced strawberries.
- ●Serve them on a tiered dessert stand alongside Irresistible Yummy Chocolate Snowball Cookies Recipe
- ●Place individual bites in mini cupcake liners for a professional look.
- ●Pair the fudge with a cup of strong black coffee or a glass of cold milk.
For a more festive presentation, you can drizzle melted white chocolate over the top of the assembled platter in a zigzag pattern.
Using a variety of textures on the serving plate, such as adding some whole almonds or hazelnuts, helps break up the richness of the chocolate.
Storage and Leftovers |
Refrigerating
Store the fudge bites in an airtight container in the refrigerator for up to two weeks. Keep them separated with pieces of parchment paper to prevent them from sticking together.
Reheating
Fudge is meant to be eaten cold or at room temperature. Do not microwave these bites, as the chocolate will melt and lose its structured shape.
Freezing
Wrap the fudge tightly in plastic wrap and place it in a freezer-safe bag for up to three months. Thaw them in the refrigerator overnight before serving.
Frequently Asked Questions |
- ●Q: Why is my fudge grainy instead of smooth?A: Graininess usually occurs if the chocolate was overheated or if sugar crystals formed during the process. Using sweetened condensed milk typically prevents this, but if you used a different sweetener, stirring too vigorously or heating too quickly could be the cause.
- ●Q: Can I use cocoa powder instead of chocolate chips?A: While possible, cocoa powder does not contain the cocoa butter found in chips. This means the fudge will not set as firmly and may result in a softer, more mousse-like consistency that requires longer refrigeration.
- ●Q: How do I stop the fudge from sticking to the knife?A: The best method is to dip your knife in hot water and dry it quickly between every single cut. The heat slices through the fat in the chocolate, while the dry blade prevents the fudge from clinging.
- ●Q: Can I make this recipe vegan or dairy-free?A: You can substitute the chocolate chips with dairy-free dark chocolate and the condensed milk with sweetened condensed coconut milk. Be aware that coconut milk has a different flavor profile and may affect the setting time.
- ●Q: My fudge is too soft to cut; what happened?A: This is usually caused time or using a chocolate with a very low cocoa percentage. Ensure the fudge has stayed in the refrigerator for at least two full hours before attempting to slice it.
Why This Recipe Belongs in Your Weekly Rotation |
Having a reliable, no-bake chocolate treat in your repertoire simplifies dessert planning. Whether you need a quick reward after a long day or a sophisticated addition to a party, these bites deliver consistent results without the stress of complex candy making.
The versatility of this recipe means you can adapt it for any season, from adding peppermint in December to orange zest in January. It fills the gap between a simple candy bar and a complex cake.
Because they store so well, you can make a large batch once and enjoy small, indulgent portions throughout the week.
Final Thoughts |
These chocolate fudge bites combine high-quality ingredients with a simplified process to create a professional-grade treat. They offer a dense, velvety texture and a deep cocoa flavor that satisfies any sweet tooth.
Gather your chocolate and prepare for a treat that will undoubtedly become a favorite in your household.
Scrumptious Chocolate Fudge Bites: Irresistible Treats
- Total Time: 25 minutes
- Yield: 24 bites 1x
Description
Rich, velvety chocolate fudge bites made without a candy thermometer. These no-bake treats are dense, smooth, and perfectly balanced with a hint of espresso.
Ingredients
- 2 cups semi-sweet chocolate chips
- 1 can (14 oz) sweetened condensed milk
- 1/4 cup unsalted butter, cubed
- 1 teaspoon vanilla extract
- 1/2 teaspoon espresso powder
- 1/4 teaspoon salt
Instructions
- Line an 8×8 inch baking pan with parchment paper, leaving an overhang on the sides.
- Place chocolate chips and sweetened condensed milk in a microwave-safe bowl.
- Heat in the microwave in 30-second intervals, stirring between each, until completely smooth.
- Stir in the cubed butter, vanilla extract, espresso powder, and salt until fully incorporated.
- Pour the mixture into the prepared pan and smooth the top with a spatula.
- Refrigerate for at least 2 hours or until the fudge is firm.
- Lift the fudge out using the parchment paper and cut into 24 small squares.
- Prep Time: 15 minutes
- Cook Time: 10 minutes
- Category: Dessert
- Method: No-Bake
- Cuisine: American


